View wishlist“Vehicle Branding Vehicle Graphics Car Sticker Bus Truck Van” has been added to your wishlist
Led SS Acrlyc Letter Sign – Bangladesh
300.00৳
Sold By:
Ishaa Mart
In stock
ADVERTISING AGENCY IN BANGLADESH | ALUMINIUM COMPOSITE PANEL BD | ALUMINIUM THAI GLASS DESIGN BD | BILLBOARD ADVERTISING AND RENT | CAR RENT | EVENT MANAGEMENT COMPANY BD | GLASS STICKER SUPPLIER AND PROVIDER | ICONE DEVELOPER | SIGNBOARD SOLUTION | ONLINE SHOPPING COMPLEX | ACRYLIC 3D SS LETTER SIGNAGE | SIGNBOARD AND BILLBOARD MANUFACTURER BANGLADESH | ISHATECH IT SOLUTION | LED SIGN BAZAR | LED SIGN BD LTD | NAMEPLATE SUPPLIER AND PROVIDER SHOP | NEON SIGNS | SS SIGNS | PANA SIGNS | SIGNBOARD MAKER BANGLADESH | SHOP SIGN BANGLADESH | GLASS PROVIDER | WALL STICKER
Call Now: +8801310088725
Categories: ACRYLIC 3D LETTER, All Common Link, Led Letter, LETTER SIGNAGE, Metal Letters, MIRROR LETTER, SS LETTER
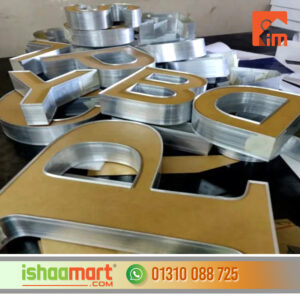
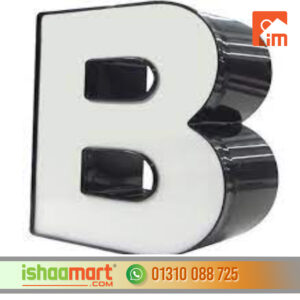
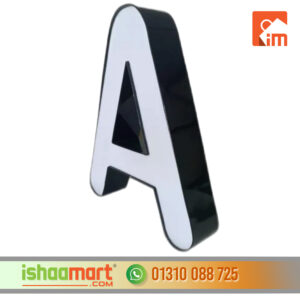
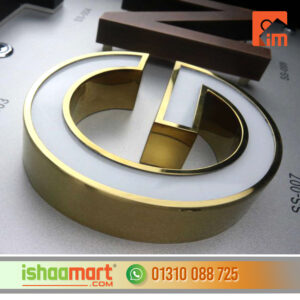
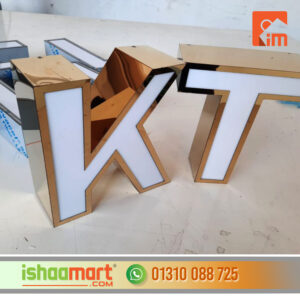
Led SS Acrylic Letter Sign in Bangladesh
Led SS Acrylic Letter Sign in Bangladesh
- Conceptualization and Design:
- Begin by conceptualizing the design of your sign. Consider the size, font, color, and overall layout.
- Work with a graphic designer or use design software to create a detailed design for your LED SS acrylic letter sign.
- Material Selection:
- Choose stainless steel for the lettering to provide durability and a sleek appearance.
- Opt for acrylic for the signboard, which can be used as the background for the letters and allows for light diffusion for LED illumination.
- Design File Preparation:
- Convert your design into a vector format suitable for fabrication. Vector files maintain precision for laser cutting and are often used in signage production.
- Laser Cutting and Fabrication:
- Utilize laser cutting technology to cut the stainless steel letters and acrylic signboard according to your design specifications.
- Ensure precision in the cutting process to achieve clean and sharp edges for the letters.
- Finishing:
- Apply any desired finishing touches to the stainless steel letters. This could include polishing or applying a specific finish.
- Prepare the acrylic signboard for the next steps.
- LED Integration:
- Plan the placement of LED lights for backlighting the letters or creating other desired lighting effects.
- Integrate the LED lighting elements into the design. Ensure that the wiring is done professionally.
- Assembly:
- Assemble the stainless steel letters onto the acrylic signboard. Ensure proper spacing and alignment for a professional appearance.
- Quality Check:
- Conduct a thorough quality check to ensure that the letters are securely attached, the LED lighting is functioning correctly, and the overall sign meets your design specifications.
- Mounting Structure:
- Create a sturdy mounting structure for the sign. Consider the weight of the materials and the overall dimensions when designing the mounting system.
- Installation:
- Coordinate with a professional installer to mount the sign securely at the desired location. Ensure that the sign is level, aligned, and securely attached to the chosen surface.
- Testing:
- Test the LED lighting elements to ensure they are working as intended. Address any issues with the installation or lighting during this phase.
- Maintenance and Care:
- Discuss maintenance requirements and care instructions for your LED SS acrylic letter sign. Regular maintenance will help ensure the longevity and continued visual appeal of the sign.ADVERTISING AGENCY IN BANGLADESH | ALUMINIUM COMPOSITE PANEL BD | ALUMINIUM THAI GLASS DESIGN BD | BILLBOARD ADVERTISING AND RENT | CAR RENT | EVENT MANAGEMENT COMPANY BD | GLASS STICKER SUPPLIER AND PROVIDER | ICONE DEVELOPER | SIGNBOARD SOLUTION | ONLINE SHOPPING COMPLEX | ACRYLIC 3D SS LETTER SIGNAGE | SIGNBOARD AND BILLBOARD MANUFACTURER BANGLADESH | ISHATECH IT SOLUTION | LED SIGN BAZAR | LED SIGN BD LTD | NAMEPLATE SUPPLIER AND PROVIDER SHOP | NEON SIGNS | SS SIGNS | PANA SIGNS | SIGNBOARD MAKER BANGLADESH | SHOP SIGN BANGLADESH | GLASS PROVIDER | WALL STICKER
Call Now: +8801310088725
- Discuss maintenance requirements and care instructions for your LED SS acrylic letter sign. Regular maintenance will help ensure the longevity and continued visual appeal of the sign.ADVERTISING AGENCY IN BANGLADESH | ALUMINIUM COMPOSITE PANEL BD | ALUMINIUM THAI GLASS DESIGN BD | BILLBOARD ADVERTISING AND RENT | CAR RENT | EVENT MANAGEMENT COMPANY BD | GLASS STICKER SUPPLIER AND PROVIDER | ICONE DEVELOPER | SIGNBOARD SOLUTION | ONLINE SHOPPING COMPLEX | ACRYLIC 3D SS LETTER SIGNAGE | SIGNBOARD AND BILLBOARD MANUFACTURER BANGLADESH | ISHATECH IT SOLUTION | LED SIGN BAZAR | LED SIGN BD LTD | NAMEPLATE SUPPLIER AND PROVIDER SHOP | NEON SIGNS | SS SIGNS | PANA SIGNS | SIGNBOARD MAKER BANGLADESH | SHOP SIGN BANGLADESH | GLASS PROVIDER | WALL STICKER
Be the first to review “Led SS Acrlyc Letter Sign – Bangladesh” Cancel reply
-
Hospital Sign Board In Bangla
Sold By: Ishaa Mart1,000.00৳ -
60.00৳
-
50.00৳
-
950.00৳
-
310.00৳
-
1,000.00৳








Reviews
There are no reviews yet.